Skip to content
Logo
  • White Label Services
    • White Label Web Design
    • Web Development
    • White Label SEO
    • Content Marketing
    • E-Commerce Development
    • Web Support
  • Articles
  • Resources
    • free Divi layouts
  • About Us
  • Contact Us
Menu
  • White Label Services
    • White Label Web Design
    • Web Development
    • White Label SEO
    • Content Marketing
    • E-Commerce Development
    • Web Support
  • Articles
  • Resources
    • free Divi layouts
  • About Us
  • Contact Us
Schedule a call
Logo
Schedule a call
Close Trigger

How to create Sticky Section on Divi

As a normal website user, it would really be a big thing if a website has a section that can be accessed and viewed regardless of where you may be in the midst of a page’s content. As a website developer, imagine an experience that you can give to the user that requires him to scroll up the same distance he scrolled down the page just to check a section again.

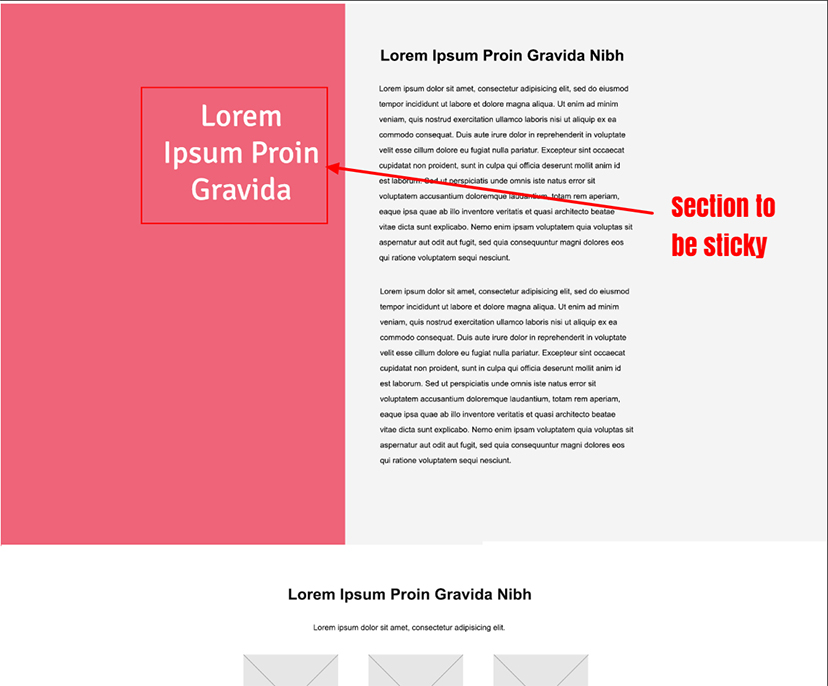
In this case, there can only be one solution: sticky section. Sticky sections or fixed sections are those sections on a webpage that remains visible and in the same position as the user scrolls down and moves about a site of sunflower maids, kansas city. Sticky sections can be a help for users to not feel distracted or uneasy because he knows that the content that he needs is right in front of him. In this tutorial, I will be teaching you how to create a Sticky Section in Divi.

Let’s start!

Instructions

STEP 1: Identify which section would be sticky.

Article Image
View Demo

STEP 2: Assigning class to the section for the sticky and stopper.

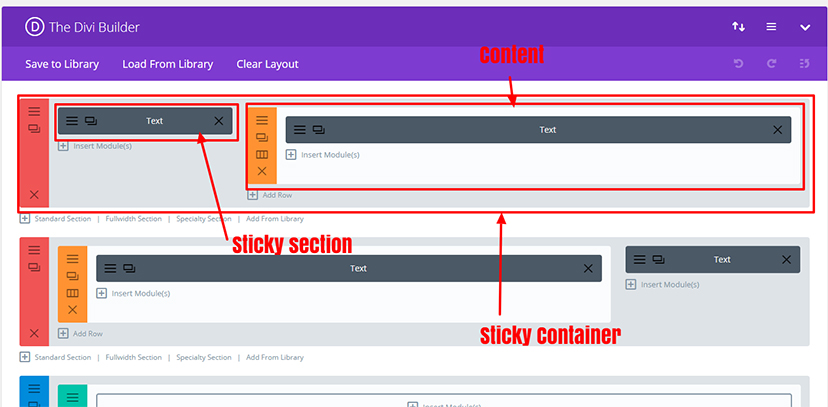
1.The screenshot explains the section for the sticky section, content and the sticky-stopper.

Article Image

2. For this layout, I used Special Section for the page.

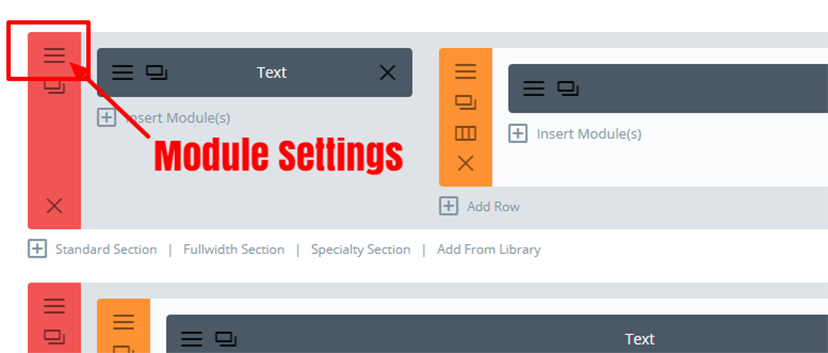
3. Open the Module Settings.

Article Image

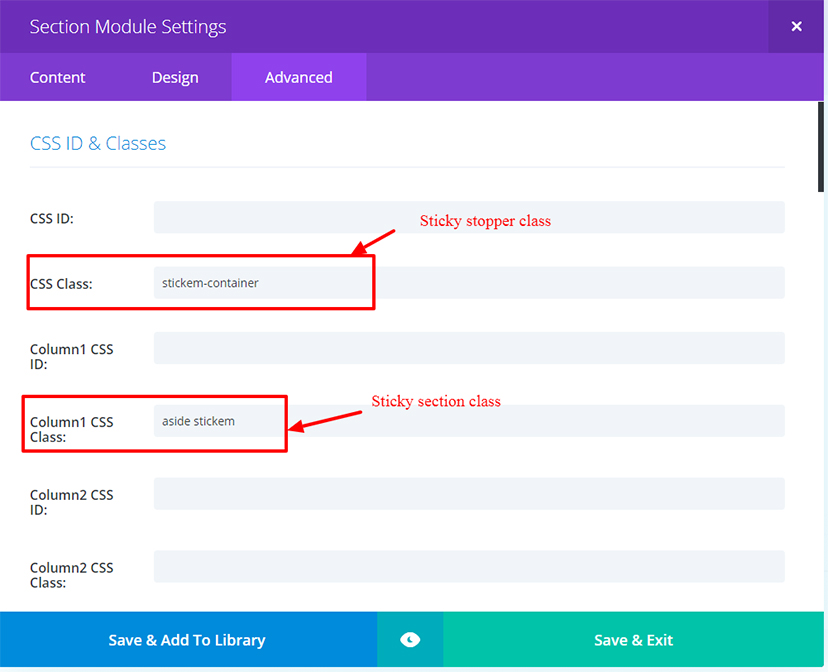
4. When you open the Module settings, go to Advanced then assign the class for the stopper and sticky section. (Note: I used a special section for the layout).

Article Image

5.Then, the next step is to assign a class for the content.

Article Image

STEP 3: Uploading the file needed for the sticky section.

1. Attach the files needed for the sticky section and upload it to your JS folder on your Divi child theme

DOWNLOAD FILES

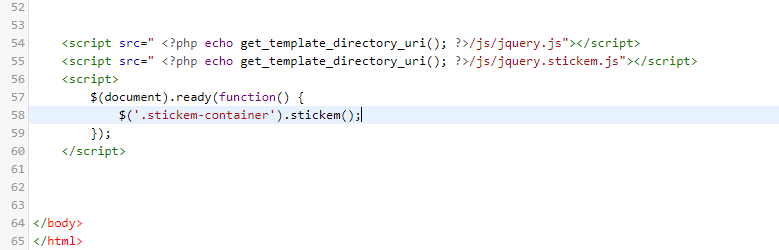
2. Then, place this script on your footer before the body tag.

Script

STEP 4: Uploading CSS.

Place the CSS on your style.css.

[css]

* {
margin: 0;
padding: 0;
}

.aside {
background: #cecece;
float: left;
/*padding: 20px;*/
padding: 0 20px;
width: 260px;
}

.stickit {
margin-left: 0;
position: sticky;
top: 0px;
left: 0;
}

.stickit-end {
bottom: 40px;
position: inherit;
left: 0;
}

[/css]

Questions?

If you have any issues or questions, feel free to message in the comments box below.

all tutorials

Loading...

White Label Web Design Explained

December 3, 2021

Goldilocks Zone: Best Country to Outsource Web Design

December 3, 2021

How to Fix the Japanese Keyword Attack in One Day

December 3, 2021

2018 Best Travel Websites Built Using DIVI

December 3, 2021

The Best SEO Plugins for WordPress in 2022

March 21, 2022

Leave a Reply Cancel reply

Your email address will not be published. Required fields are marked *

Services
  • WordPress Development
  • Web Design and Development
  • E-Commerce Development
  • Website Support
Free Resources
  • Web Design Brief
  • WordPress Plugins
  • Website Template Kits
  • WordPress Templates
Projects
  • WpBuilt
  • ScaleRocket
Support
  • About Us
  • Privacy Policy
  • Free Divi Layouts
Contact Us
  • J & J Bldg, 111 M.H. Del Pilar, Silang, 4118 Cavite
  • J & J Bldg, 111 M.H. Del Pilar, Silang, 4118 Cavite
  • (046) 423-6961
  • hello@gocrayons.com
Facebook Twitter Youtube Instagram
Logo

© 2022. GoCrayons. All Rights Reserved.

Logo
  • White Label Services
    • White Label Web Design
    • Web Development
    • White Label SEO
    • Content Marketing
    • E-Commerce Development
    • Web Support
  • Articles
  • Resources
    • free Divi layouts
  • About Us
  • Contact Us
Schedule a Call